To edit a location, you need to be inside your Screen Network's dashboard.
1. Click on the cogwheel icon beside 'Locations'.
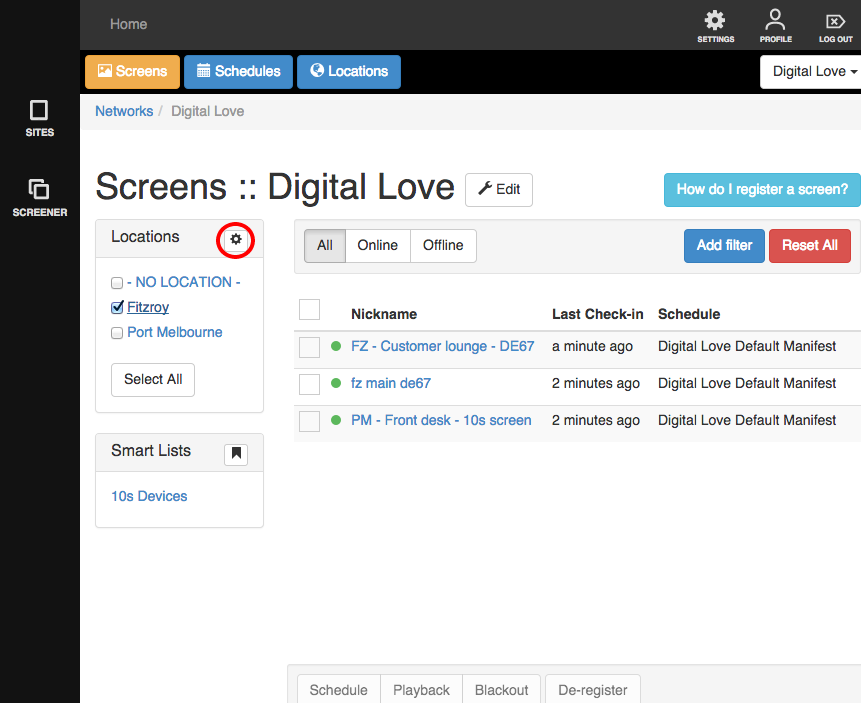
You will be brought to the 'Locations' page.
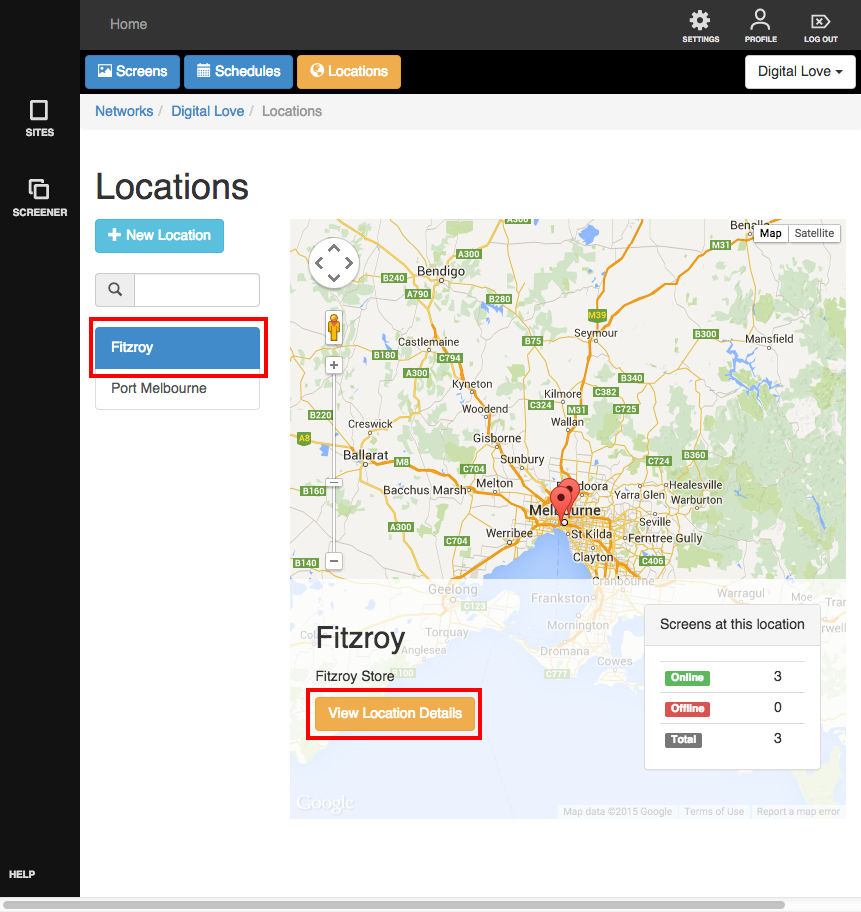
2. Click on the name of the Location you wish to edit.
3. Then click on the orange 'View Location Details' button.
There are 2 tabs. Info and Floorplan
The Info tab contains the location's name, description and coordinates.

Edit the details and click 'Save' when you're done.
*The Reset button removes all edits you've made. You can't reset the information once you've clicked 'Save'.
The other tab is the Floorplan.
Adding a Floorplan is super easy!
1. Click on 'Add File'. This is located at the bottom of the screen. You may have to scroll down depending on the size of your screen resolution.
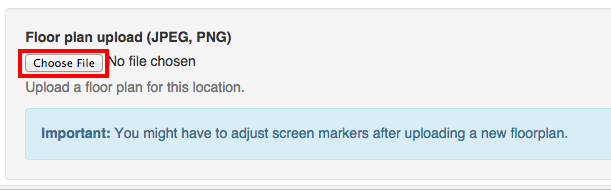
2. Choose your floor plan's image file and click 'Open' when you're done.
Voila! Your floorplan has been added and now ready for use!
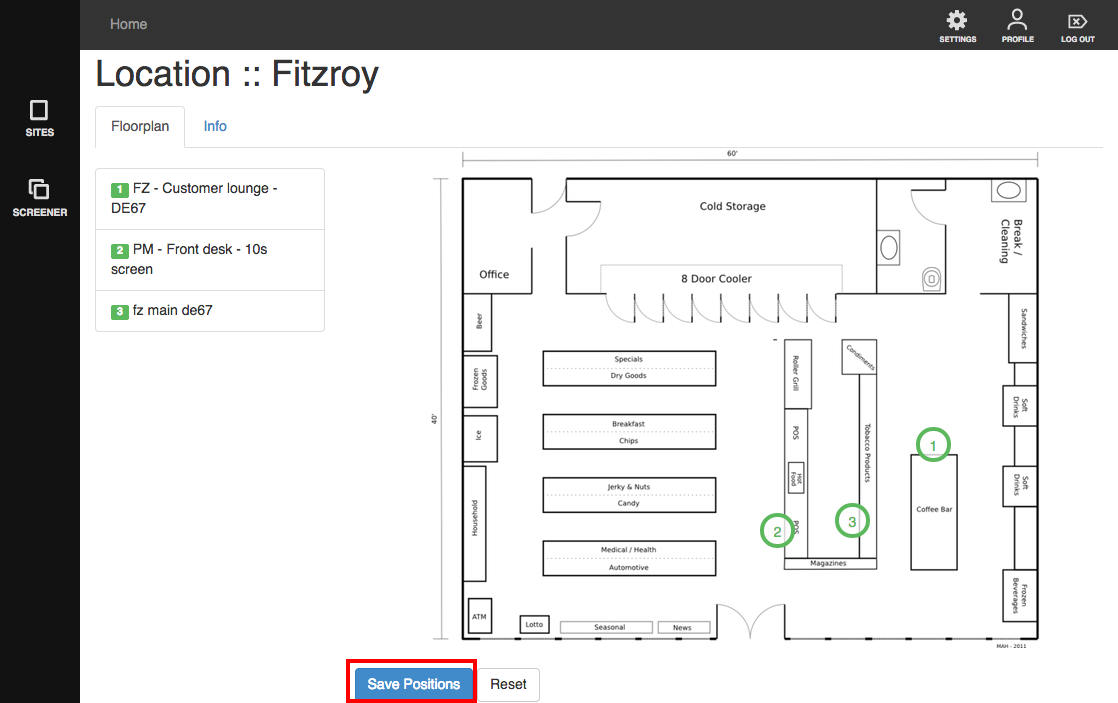
3. Drag the number icons that represents your devices inside your store to their respective locations. The list is on the left side, so make sure you're placing the correct device to each location.
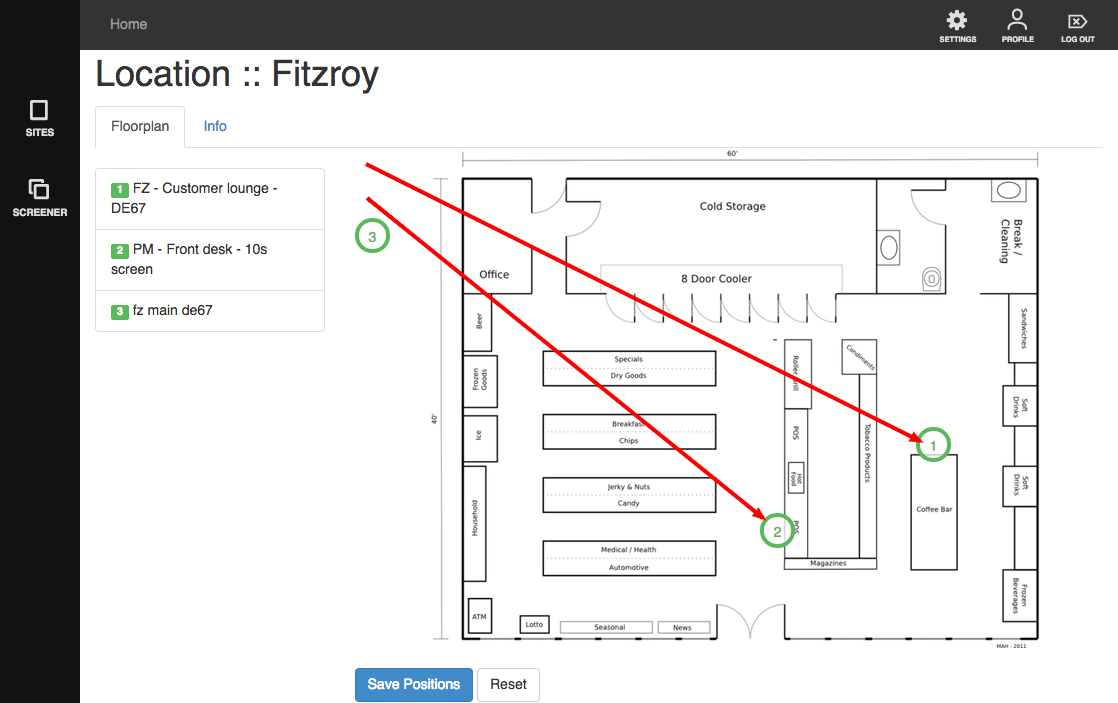
4. Once you're done, click 'Save Positions'.