Websites and screen sites are awesome marketing tools that help generate leads or accept customer feedback through online forms.
Publisher's Form Actions can help you set your form up so you can make sure that these leads go to the right people, and automated email have the correct content.
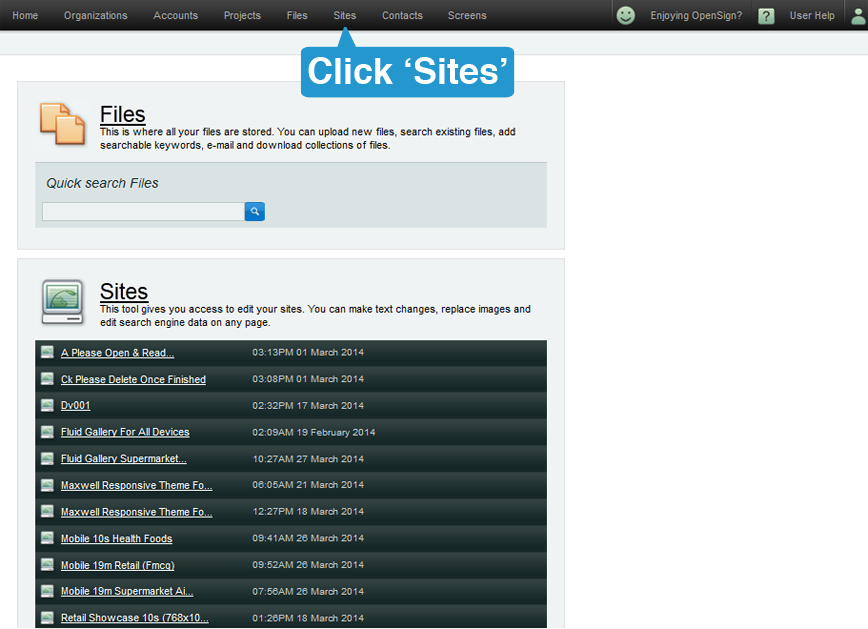
1. Setting up a form action is a super-admin only function. From your Dashboard, go to 'Sites'
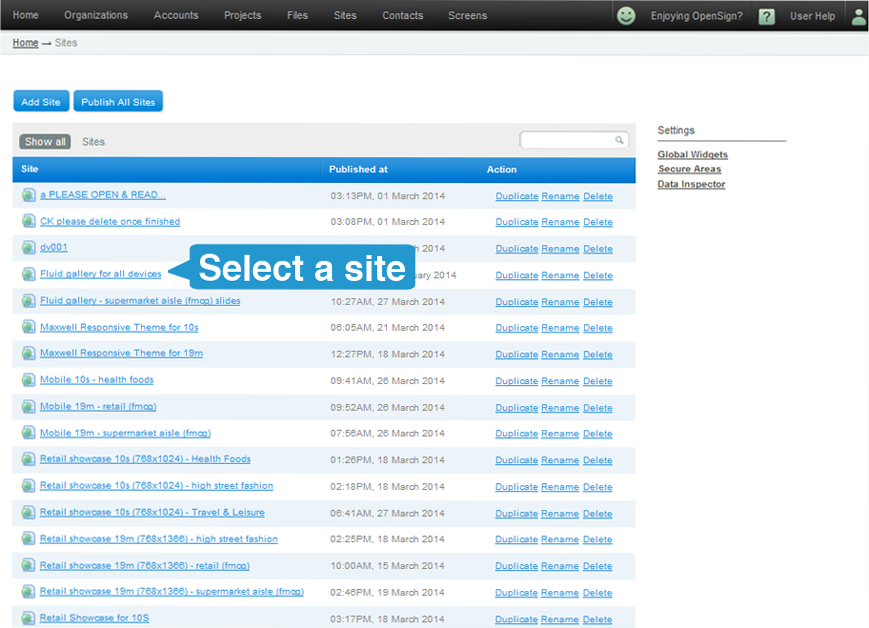
2. Select the site that you wish to set form actions on.
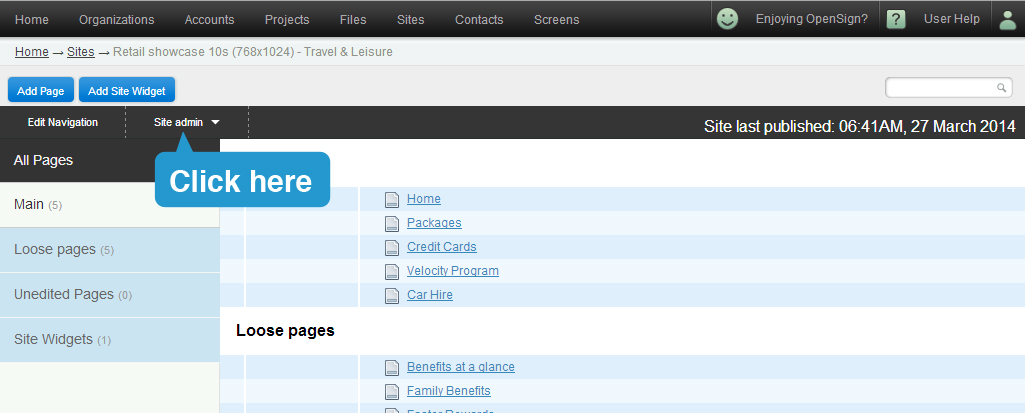
3. Click on Site Admin.
4. A dropdown will appear. Click 'Form actions'.
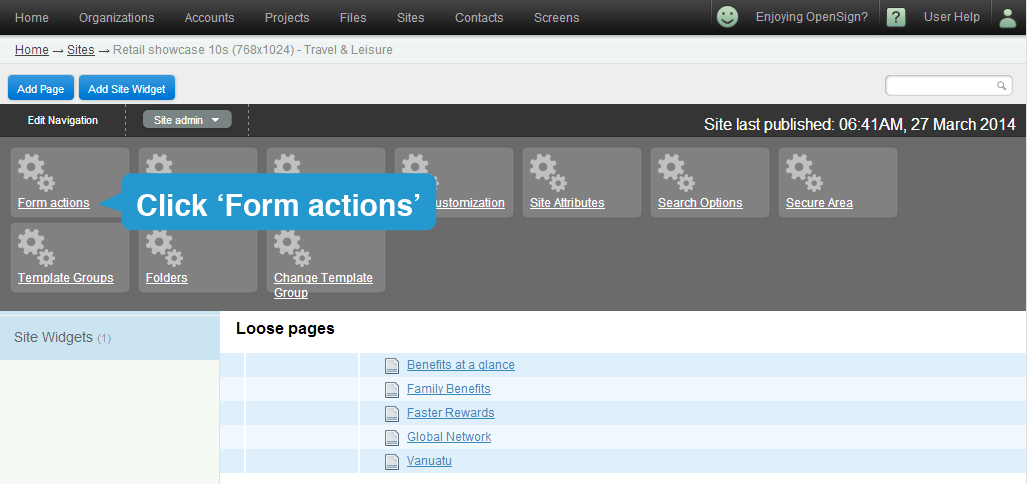
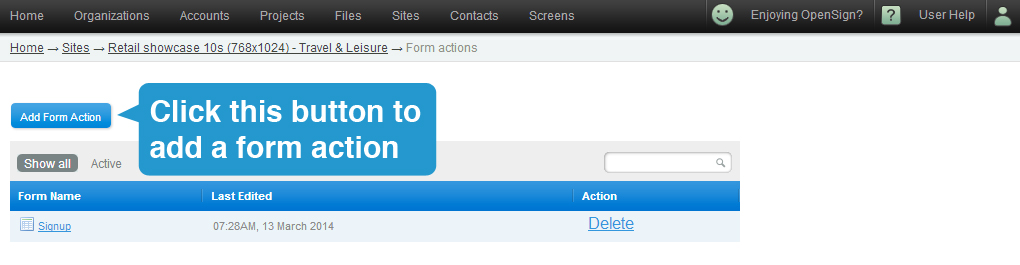
5. Once you're in the Form Actions page, a list of all existing form actions will be listed in it. On top of the list is a blue button that says 'Add Form Action'. Click it.
You'll be going through a 4-step process.
A. Name Form - Type your form's name and redirect URL on the 2 fields, then press 'Next'.
The redirect URL is the page in your site where your site visitor will be directed after submitting the form. It could be the home page of the site or a thank you page you have created.

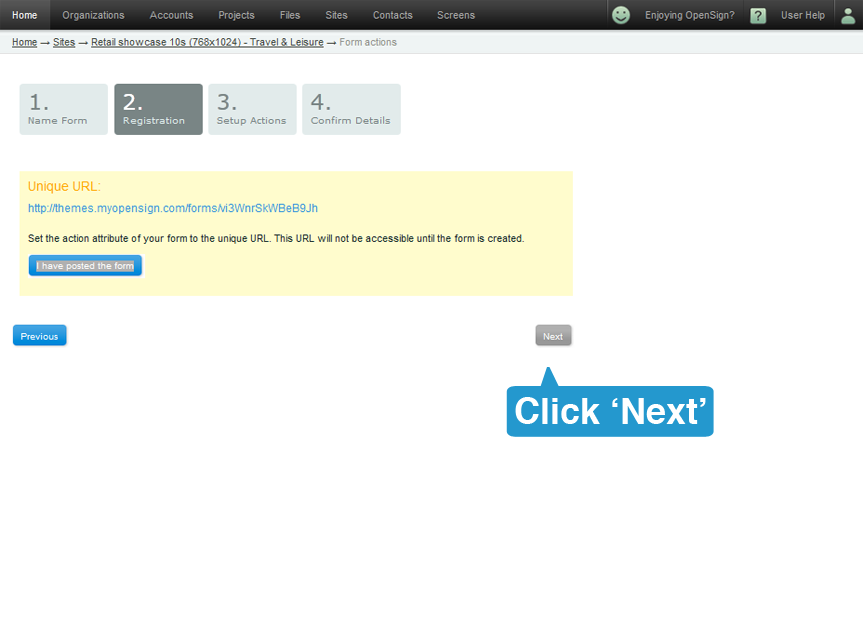
B. Registration - This page displays the form's unique URL to connect the form to your contacts database.
This is primarily for Front-End to use, so you can just skip this step. Click on [Next].
C. Setup actions - this is where you tell the form whether to send a notification email to you or to send a confirmation email to the registrant.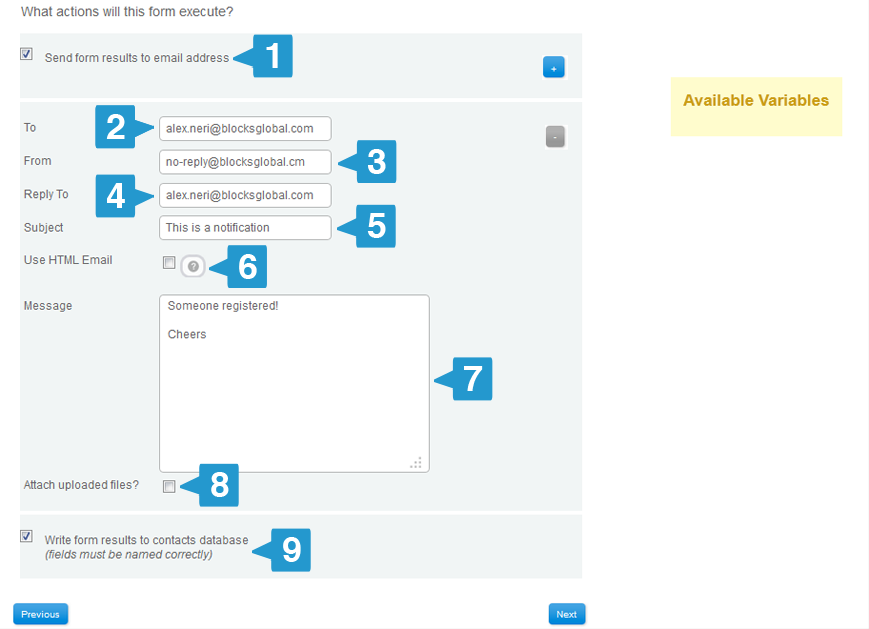
1. Checkbox to toggle the email sending option. If you wish for the form to send a separate email and content, you can just click on the [+] button at the top.
2. To - This is where the notification gets sent. You can send the email to multiple recipients by placing a comma between them.
3. From - This is what appears on the sender's name field of the email to the recipient.
4. Reply to - Email address set here will appear as the email address of the sender of the email notification.
5. Subject - The email's subject
6. Use HTML Email - Choose to send a pre-made email template instead of plain text email. (See Email Marketing)
7. Message - This is where you put the contents of your email. If the form has variables, you can indicate them in the email by adding double brackets {{ }} before and after it.
8. Attach Uploaded Files - If the form asks for an attachment, you can set it to attach the files to the email by checking the checkbox.
9. Write form results to contacts database - you can set the form to save the contact information to the database by selecting this checkbox.
If you wish for the form to send a separate email and content, you can just click on the [+] button at the top.
Once complete, click on [Next].
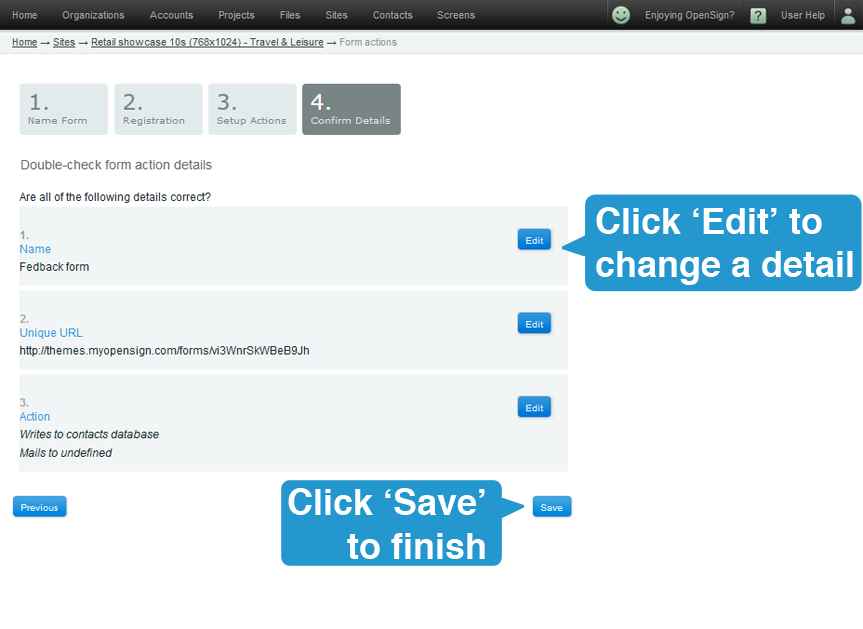
D. Confirmation - this screen shows you a general overview of the settings you have entered in the previous steps. You can change any one of them by clicking on [Edit]. Otherwise, complete it by clicking on [Save].
You will then be taken back to the form actions screen - with your newly created form :)